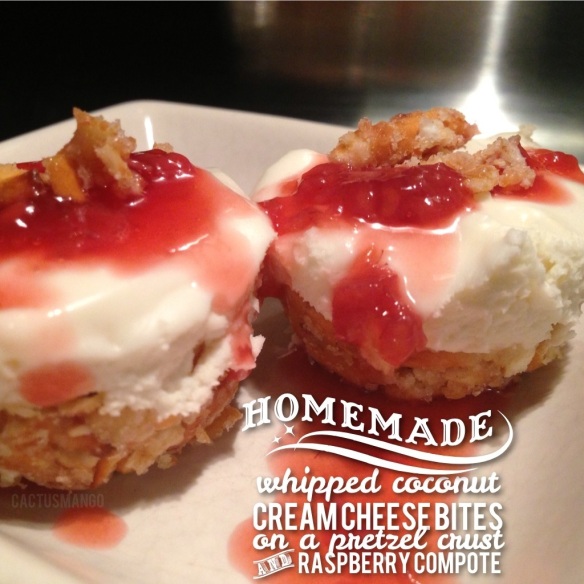
Coconut Cream Cheesecake Bites on a Pretzel Crust

20130926-114435.jpg

ICEBOX CHEESECAKE
I started off with this ice box cheesecake recipe I spied on pinterest. With a few of my own substitutions/additions. Everything’s pretty muchthe same, except instead of whipping cream, I used whipped coconut milk. Instead of a graham cracker crust, I used crushed up pretzels. I added zest from one lemon and 1 teaspoon of vanilla extract.

PRETZEL CRUST
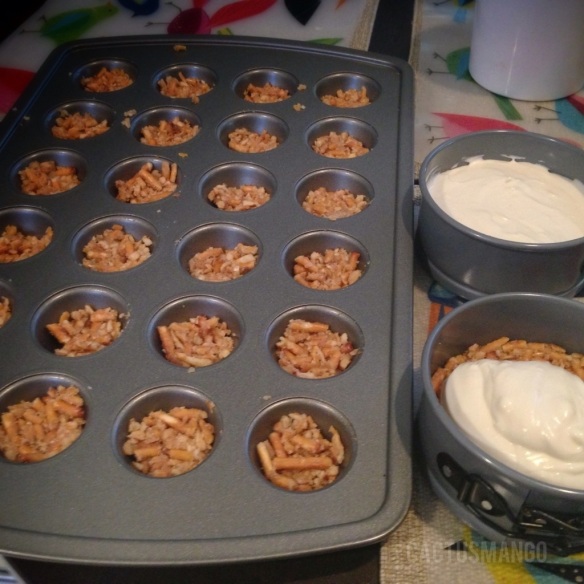
For the crust, I followed the quantities in the recipe above. Subbing out graham crackers for crushed pretzels and it turned out delicious!

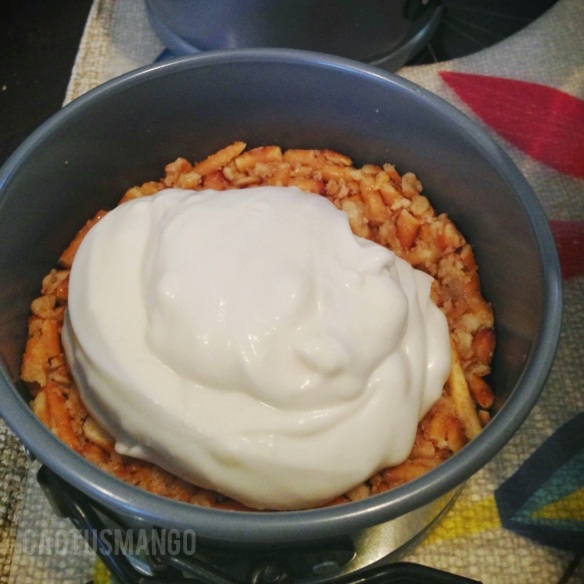
I put the pans with the pretzel crust in the fridge to firm up, while I tackled the whipped cream. (Note: This recipe was good for one pan of 24 mini cakes and two small springform cakes. I believe the springform pans are 4-5 inches.)

20130927-130716.jpg

20130927-130335.jpg

WHIPPED COCONUT CREAM
I pinned this recipe when I started looking into the Paleo diet & have always wanted to try it. Finally got to do just that, since I didn’t have regular whipped cream for this cheesecake recipe.

I was skeptical about this one. Plus, it calls for a “full fat” coconut milk and I only had “lite”. I stuck that light can in the fridge & hoped for the best. Luckily, we did a quick trip to the grocery store & they had the regular coconut milk. Stuck that in the fridge overnight too. The next day, opened the can, scooped out the thickened coconut milk, but it still didn’t seem like it would be enough, so I did open up the “light” can. It yielded even less than the full fat can. I combined the two & crossed my fingers!

Also, I couldn’t bust out my Kitchenaid Mixer because the thing weighs a ton & in my prego/incompetent cervix state, lifting it to the counter was not an option. So, I had to brave my first attempt at hand whipping cream! Boy was I relieved & surprised that it was actually working! I had to stop & ask my mom to video me whippin’ it real good! [Watch if you dare]

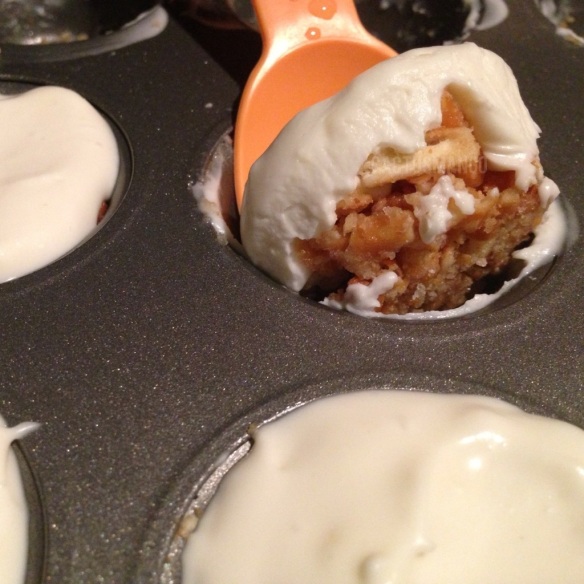
In this photo below, you can see the cream hadn’t fully firmed up, but I just couldn’t wait to taste it!

20130927-131436.jpg

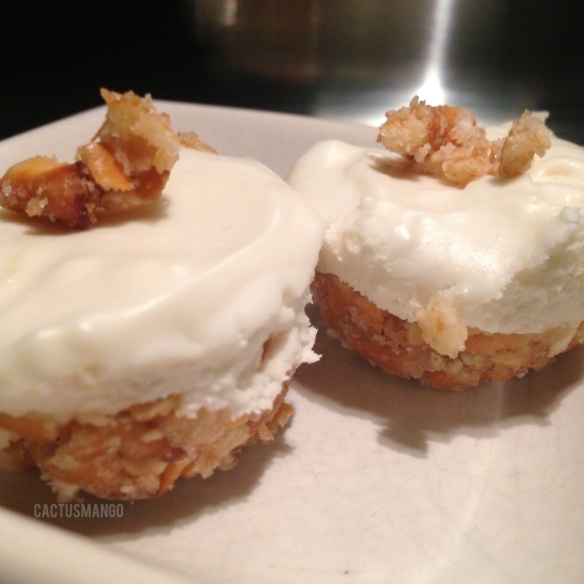
Here they are the next night, nice & firm. When it’s chilled well overnight, the little bites pop out of the pan easily without losing shape or crumbling.

20130927-131142.jpg

RASPBERRY COMPOTE
The raspberry compote was a pure experiment! Never made nor ate compote before so I don’t know if what I made was a good compote! But it sure is tasty to me! I used a small carton of fresh organic raspberries, about a cup of boiling water, 1 teaspoon of vanilla extract, 1/4 cup of brown sugar, juice & zest from half a lemon and several sprigs of organic mint leaves. Threw it all in a little pot & boiled it for about 5 minutes. Took out the mint sprigs & transferred it to a mason jar to cool, before chilling in the fridge. It has a thin syrup sauce consistency and has a bright berry mint flavor. Delightful!

20130927-133954.jpg

BLUE AGAVE + CHIPOTLE “LONGANISA”

Here’s a semi-homemade pseudo healthy twist on the Filipino favorite sweet breakfast sausage Longanisa with fried garlic rice & a sunny side up egg, better known for it’s acronym Losilog = Longanisa + Sinangang + Itlog!

20130710-080652.jpg

fair warning – I was cooking by sight & taste this morning, so I didn’t measure the ingredients!

Tip – If you’re cooking with fry pan like me, cook the cauliflower first before the Longanisa. The Longanisa will make the pan super messy & sticky, but if you use a non stick & rinse of the pan while it’s still hot – right away, it will be a quick clean up!

GARLIC CAULIFLOWER “RICE”
by CACTUSmango

::Ingredients::

• 1/4 head of Cauliflower (finely chopped)
• 1-2 Tablespoons of minced garlic (also from Costco)
• about 2 Tablespoons Virgin Cold pressed Coconut Oil (from Costco. & that’s a guesstimate again, I just squirted directly into pan without measuring!)

::STEPS::

1. Heat coconut oil in medium high heat pan & saute the garlic. You can cook your garlic lightly or til it’s crispy, both ways I like.
2. Pulse cauliflower in food processor or simply chop it up into rice sized bits.
3. Add to pan & toss with garlic oil until al dente.

BLUE AGAVE + CHIPOTLE “LONGANISA”
by CACTUSmango

::Ingredients::

• 4 Johnsonville Maple Sausage (frozen from Costco)
• 4 tablespoons of Organic Blue Agave Syrup (also from Costco. Qauntity is a guesstimate because I just drizzled a bunch over the sausage in the pan)
• Organic Ground Chipotle powder (add as much as you like)
• Water (just enough to, about half way up the sausage. Maybe i used 1/2 cup)

::STEPS::

1. Place all ingredients in non-stick pan over medium heat, boil then reduce heat to medium low. Cover & simmer until sausage is almost cooked through.
2. Uncover & increase to medium heat. Turn occasionally. Let liquids reduce. Ready to eat when caramelized!

I’m pleasantly surprised that the Cauliflower “Rice” went well with this. You can serve this atop rice of your choice with sunny side up or over medium for pregos like me.

After trying this, I could use a lot more heat! It is 4th of July after all! Add more spice to your liking & Have a great weekend!

Itty Bitty Pizza Bites

Itty Bitty Pizza Bites by CACTUSmango
Itty Bitty Pizza Bites, a photo by CACTUSmango on Flickr.

Via Flickr:

After the cauliflower cheese crusts were baked & removed from the cupcake tins, my daughter & I topped them with leftover Giada Tomato Basil spaghetti sauce that I added brocolli and carrots to last night. I also cut up some string cheese and somed Chicken Artichoke Mozzarella sausage from Costco as the “pepperoni”.

I’ve been wanting to try this Cauliflower pizza crust recipe I found on pinterest. The pix posted by Beth from Eat.Drink.Smile. look so nice and crispy. Mine however didn’t turn out as I had hoped. Mine were a bit more on the quiche-like texture. The edges did get nice and crispy. But, I was hoping for a nice thin crust like texture all around. Perhaps if I put less mixture in each cupcake tin, next time. I’ll also line the cupcake tins with some parchment paper next time.

Itty Bitty Pizza Bites - closeup

My little 3 yr old liked it enough to eat two of these for dinner, so I’m happy and I’d try this recipe again.

Baked Cheesy Cauliflower with Proscuitto

I don’t normally shop at Fresh & Easy, because it’s out of the way…but, they had a buy one get one free deal on Breyers Icecream which I could not pass up, in hopes that they had some mint chocolate chip left. Unfortunately, no more Mint Chocolate Chip, but, I found a bunch of veggies and fruits marked down to half off because they were close to their sell-by-date. I snagged two heads of cauliflower for $1.25 each. I also don’t ever buy proscuitto because it’s too pricey for my blood. But it too was 50% off. Alot of times, what I cook comes about because that’s what we’re craving for. Othertimes, your meal comes about with whatever you can find on sale. I realized the proscuitto would probably go well with one of my favorite dishes baked cauliflower & cheese. My dad’s is the bomb. I’m hoping this version will be a hit with my S.O. and L.O.

My parents would put the cauliflower florets in the pan raw & pour a creamy mixture over it, then top with shredded mozzarella/sharp cheddar from the bag. Less steps, but, it takes longer to bake. Being hungry while cooking, I par boiled my cauliflower florets and then used the the Fast Bake option on a Convection Microwave Oven…Just to crisp up the top cheesy layer…takes about 10-15 minutes vs. the hour + it’d take to bake raw. I wonder if one of those kitchen blow torches would work…hmmmmm?

(Update Dec 17, 2011 – tonight I followed by brother Gary’s lead and used a whole package of bacon.  I topped the dish with crumbled up pieces…mmm!  So good!)

Ingredients
1 stick of butter (optional: if using bacon, reserve the bacon grease, so bad, but can’t resist!)
1 onion, chopped fine
2 T finely chopped garlic
1/3 cup of chopped celery (optional)
1/2 cup to 2/3 cup flour
2 cups of whole milk 1
t fresh minced rosmary (optional)
1 t fresh minced basil (optional)
salt & pepper to taste
1-2 heads of cauliflower, bite sized florets
One 4oz package chopped-up proscuitto (my bro requested more meat…so, if you can afford it, put 2-3 packages of proscuitto or add BACON or chunks of chicken or sliced up deli meats, whatever you have)
2 cups shredded parmesian cheese
1/4 cup shredded gouda cheese
1/4 cup shredded cheddar cheese
(or Use whatever you have in the fridge or your favorite cheese.  I often grab a bag of shredded cheese Mexican cheese blend.  And without measuring, I grab huge handfuls, mix it in with the white sauce and layer it ontop of the cauliflower once in the dish, for that crusty cheesy top!)
Stuffing (I tried this today, Dec 17, with some leftover stuffing…because of the amount of bacon I put on top, I barely noticed there was any stuffing…will try to do it again with more stuffing on top…)

side notes:*if you’re using a regular oven, preheat your oven now before step 1 to 400 degrees. Hold off ’til after step 3, if you’re using a microwave convection oven.
*if you’re using block cheese, go ahead and shred it up before you start cooking.
*I love my Kitchenaid food processor attachment that came with the Immersion blender. Great for chopping up the onions, garlic and celery.

Steps
1.(This is an added step to my parents original recipe. They would simply make the sauce and pour it over uncooked cauliflower florets and bake it for a longer time. I remember waiting hours for this dish to come out of the oven.)  My update on it is to first Parboil cauliflower florets, drain, put into a buttered up baking pan. I used about 1-2 T of butter to grease up the pan edges. I used a 38x25x4 cm pyrex baking dish, so that I could have one layer of cauliflower. This helps it bake faster and also you get a bigger surface area of the yummy cheese crust!  Now, I have a little munchkin, so I snuck her a bunch of plain cauliflower to tide her over until I finished cooking the dish.
2. Melt remaining butter in large pot on medium heat. Add onion, garlic and celery. Stir & Saute until translucent.
3. I like to lower temp to medium low heat, to keep butter from burning. Add a little flour at a time, stirring as you go to make a roux Add Salt & Pepper to taste. I chose not to add too much salt, because the cheese & proscuitto have some saltiness to them already.
4. Go ahead and preheat your microwave convection oven to 400 degrees.
5. Ok, back to the flour…Once flour is incorporated evenly in with the butter, raise the temp up to medium heat, while pouring a little milk at a time, while stirring, making sure to not let the milk burn on the bottom of the pan. Keep stirring milk until you have a chowder like consistency. You don’t want it to be soupy thin. When you put it in the oven, you want it too be somewhat thick because the liquid in the cauliflower, will mix in with it while baking and thin it out.
6. Ok, now we layer the remaining ingredients on top. First, pour the sauce all over the cauliflower. Use a spatula to wriggle around the cauliflower to get the sauce to get into all those crevices. Then, sprinkle like crazy your cheeses and proscuitto.
7. By now your oven should be preheated. If not, humb & twiddle your thumbs awhile waiting for that *ding* Ok, now place the uncovered dish in the oven and set to 12 minutes.

so, here’s the dish ready for the oven.

and 12 minutes later straight from the oven.

Although my S.O. and bro liked it, it’s just not their favorite. I have a feeling it’s because it’s mainly a veggie dish. They’d probably enjoy it more, just as a side dish to a rack of ribs or something that once moo’ed. Well, my little girl liked it and asked for more. It’s my favorite too! So I’ll have to try making this dish in smaller batches and freezing it for make-ahead meals for my munkin & I. Hope you give this a go and let me know what you think.

Orange Ginger Mint Water

Happy Monday!

Here’s a simple and refreshing drink great for a day of bbq’ing! This recipe came together quickly because I just threw in ingredients that I had on hand. I would have loved a hit of lemon taste…I didn’t have any calamansi nor lemons. I even peeked into over at my neighbors trees…none to be seen. Darn. Next time! I substituted with two fingers of ginger. (anything with an “o” in front means it’s organic)

Orange Ginger Mint Water

Half a pitcher of water
1/4 a pitcher of O apple juice
1/4 a pitcher of orange juice
1 orange, sliced thinly with peal left on.
1 O apple, sliced thinly, skin on.
1 bunch of mint sprigs (I was fortunate to be gifted some fresh mint from my bro & sis in laws garden…awesome)
2 fingers of ginger, sliced big.
3-4 Tablespoons of Orange Blossom Local Honey (disolve in a little water first, then stir into pitcher) add as much as you like.

Stir all of these ingredients together in a pitcher and let chill in the fridge a couple hours before your guests arrive.

Potluck Potato Salad

Summer time is here! What better way to welcome the hot arizona temps, than with Pool Party Potlucks? Our little family of three will be attending our first one today, carrying with us a nice big vat of potato salad. {Never mind the diet, besides I invested in a new tankini that I can wear comfortably while pounding all the yummy food!}

This potato salad has bright flavor yet is quite filling, so it’d be an insult to call this a side dish. One sad thing about this, is I forgot to grab a bag of pistachios! Ay-yay-yay! I hang my head low and pout. But, I’m hoping the pound of fried chopped bacon {thanks dar} might distract the pool party peeps from what’s missing. Maybe they won’t even know. But I know.

MarMar’s Potluck Potato Salad

2 c Olive Oil Mayo
1 c Dijon Mustard
3 t roasted organic garlic
2 red organic apples
3 calamansi
2 c chopped celery
2 c chopped red onions
6 hard boiled organic eggs
1 package bacon
10 regular sized red potatoes {I deliberated long and hard about getting the organic bag…but, it was $3 more, so I caved I got regular instead}
4 sprigs fresh organic dill
ground dill weed, salt + pepper to taste

1. Wash and quarter potatoes. Boil in lightly salted water & garlic until fork-tender. Remove from water and let cool in fridge.
2. Using same the same boiling water for your eggs. Cook until hard-boiled. Let cool then peel and chop.
3. Fry bacon and chop when cool. Reserve bacon grease. Set aside.
4. Chop onions and celery and saute in bacon grease. Set aside.
5. Rinse and chop dill.
6. Rinse and chop the apples and squeeze calamansi {or lemon} on it to keep it from browning.
7. Mix the mayo, ground dill, salt, pepper, chopped fresh dill and roasted garlic.
8. In a large bowl, hand toss all the ingredients. {If you have pistachios, go for it! You’ll love ’em.}
8. Put back in fridge to chill before the party. When transporting it, put it in a cooler.
9. Oh, and don’t forget, to compost your veggie scraps and eggs shells 😉

Happy Memorial Weekend!

Humble Mungo Guisado

I’ve been craving this for a long while and finally whipped up a batch yesterday. There is something so comforting and wholly satisfying about sitting down to a humble steaming bowl of mungo guisado.

I usually call my mom, for cooking instructions, but since she’s is in the Philippines right now, I had to suffice with following recipes I found online. You can easily make this a vegetarian dish and it will still fill your tummy with goodness.

This is what I gathered online: Pre-boil the mung beans for about 30 min. Stir occasionaly to make sure the bottom doesn’t burn. Sautee slices of pork in onions, garlic and tomatoes and patis (fish sauce) to taste. Stir in the cooked mung beans, along with as much broth as you want. I prefer my mungo to have lots of liquid. (Add shrimp and spinach) I would prefer to add kangkong leaves, but can’t find them here in the desert. I’ll have to see if LeeLee’s or Mekong Plaza sells anything like it. But, a good alternative is spinach. Serve over steamed rice or eat without rice. Enjoy!

Quick Bite Recipe: Bread Salad

I never had bread salad before, until I ate at Wildflower Bread Company on McClintock and Guadalupe. I really loved it. Wildflower’s bread salad is called Tomato Bread Salad ($5.29) and has bread, tomato, garlic, basil, parsley, red wine vinegar, red peppers, marinated mushrooms and olive oil, served atop field greens with grated Parmesan and Balsamic Vinaigrette. They also put a scoop with the sandwiches. That’s where I first sampled it.

I inquired about what particular Wildflower bread variety is used, bought their Nine Grain loaf and set out to make my own batch at home. I’ve made it several times now for myself, Wednesday Night Dinners and other gatherings. The first time I made it, I added fresh mozzarella balls and dumped a container of marinated artichoke hearts/mushrooms all from the olive bar inside Safeway, which was recently listed as #2 Healthiest Grocery Store in the nation. I’m lucky to have one within walking distance from our house. As I don’t get to Wildflower that often, I switch up the bread with whatever’s on sale at either Safeway or the Marketside (also just a hop skip away). Tonight, I made a batch (with mainly organic or natural ingredients) for hubby & I.

Tools

Washed Hands
Peeler
Kitchen Sheers
Med-Large Salad Bowl

Ingredients (Just toss whatever you like right into your salad!)

1 slice of Organic Provolone Cheese (hand torn into bite sized pieces)
2 slices of Oven Roasted Deli Turkey (I use Hormel Natural Choice.)
1 slice of Light Whole Wheat Bread (hand torn into bite sized pieces)
1 handful of True North Pistachio Chips (crumbled up)
1/4 peeled red apple (sliced into 1/4 in. sticks with kitchen sheers)
4 Organic Whole Dried Montmorency Cherries (cut up with kitchen sheers)
5 capfuls of Organic Balsamic Vinaigrette
3 handfuls of Organic Herb Pre-washed Salad

Steps

1. Hand tear cheese/bread/ham and crumble pistachio chips into bite sized pieces, directly into salad bowl.

2. Peel apple. Slice apples, tomatoes & cranberries into bite sizes. (It doesn’t have to be precise. I use kitchen sheers so that I can slice the tomatoes, apples & cranberries right into the bowl. )

3. Drizzle 2-3 capfuls of balsamic vinaigrette into the bowl. Mix ’til bread is thoroughly coated & has absorbed the vinaigrette.
4. Toss in the greens and mix well with the remaining vinaigrette.
I know this seems like a recipe soley for the spring and summer…but, I love the nuttiness, sweet & tart fresh taste of all the ingredients, which definitely gives that warm happy feeling on this cold Decemeber day.

MarMars’ Spam Musubi Recipe

For those that cringe at the thought of spam anything, then this post is not for you, so go away. 🙂 But for those that know how addicting spam musubi can be, stay and drool with me. A few months back, my friends & I were in awe of these breaded spam musubi brought to Ryan & Blenda’s baby shower. (I can’t recall who made them, but I’ll update that bit of info, when I find out.) So, Let’s just say, the musubi tray was wiped out in the blink of an eye. I was lucky to literally lunge across the sink & grab the last piece. Oh yes, I had no shame. That spam musubi had my name on it. The spam slices were lightly breaded (probably with Panko) & fried; then wrapped neatly in blocks of white sticky rice and seaweed, then cut halfway on the diagonal; drizzled lightly with a teriyaki type sauce. The crunch texture was the perfect contrast to the soft rice and chewy seaweed. These hefty handfuls were so simple, so yummy, and so perfectly compact. And they left a warm fond memory on all our bellies.

Since then, our groups of friends have gobbled up two more variations of this spam musubi: recently Nelly & Ninette made a batch for Mia’s birthday party, non-fried, but the spam was marinated in a soy based mixture…oooh yeah. And when it was my turn to cook for When’s d Night Dinner. That time, Ron rigged up his own sushi mold by cutting off the bottom of Spam can, and using a slice of spam to compress the rice down. Worked out pretty good. But, wasn’t so neat and even though we pinched down the edges of the can, it was still a bit dangerous sticking our hands into the can. Thankfully, all digits were left intact.
This Saturday, Ron had a hankering for Spamsilog: spam, rice with 2 over easy eggs for breakfast. So of course, I obliged and fed my man exactly that. But, I had other plans for my three slices of spam…I’m sure it’s obvious what I had in mind.

And thanks to Ninette, my Spam Musubi turned out perfectly shaped with the brand new plexi-musibi maker. It’s so pretty! It cost $11 and I think she picked it up at either Lee Lee’s or Mekong Plaza. I love it!

My version is basically a combination of all varieties of Spam Musubi that we’ve enjoyed the last couple months: Marinated spam, breaded and fried spam, plus the extra touches of scrambled egg and pandesal bread crumbs! (Yes, pandesal bread crumbs, baby. I didn’t finish the dozen Manila Bakery pandesal, so, rather than let it rot in the trash bin, I gave it a second life. It’s final life ended in my backyard compost bin, courtesy of my buddy Myrna, whose passionate about many things, composting is not one of them, which turned out good for me.)

***Disclaimer, I don’t tend to follow recipes, so I think it’s funny that I’m posting a recipe here, since I didn’t really follow any exact measurements. I just taste, things while I cook, adding more seasoning as I go. Hence, my recipe…it’s really a guide…so these measurements are guestimations. Good luck!

MarMars’ Spam Musubi
PREP TIME 4 MIN COOKING TIME 10 MIN SERVES 3-4

Spam Marinade
6T Soy Sauce
2T Mirin
2T Vinegar
2T Peanut Oil
2t Sesame Seeds

Whisk all these up.

Slice the spam to the desired thickness. I used the spam slicer (love this! thanks rod!) Marinade the spam for about 5 minutes. Pan fry the spam ’til nice & crispy. Dry on paper towels.

Breaded Spam
1 can of Spam
2-3 Hard Pandesal (crumbled up) – I bought mine from Manila Bakery, but didn’t eat them fast enough. So, instead of trashing them, I figured I’d make it into bread crumbs…and whatever I didn’t use went into my compost bin.
2 cups Panko breading (just depends, you may need to add more as you go)
2 egg whites (whisked)
2 cups flour

Mix the Pandesal crumbs with the Panko breading. Lightly cover each fried spam with flour. Quickly dredge in the whisked egg whites, then quickly coat in the Pandesal/Panko mixture. And fry until browned. Set aside on paper towel.

Scrambled Eggs
2 whole eggs
3 T Mirin

Whisk the eggs & mirin thoroughly. Pan fry on low heat. The finished scrambled egg should be very thin. Set aside.

Sticky Rice
1c White Rice (recommend Calrose)I had Jasmine on hand.
2T Sweet Saki (optional)
1T Sugar (optional)
1T Furikake (optional)

Mix the above ingredients together. Set aside.

And, of course you’ll need a bag of Nori. I just eyeballed to make sure the Nori equaled the length of the musubi and made the Nori as long as I’d need to wrap around the musubi. So, it will vary, depending on how much rice you like, if you do a single layer or double layer of rice.

Time to Assemble the Musubi

You will need the musubi mold

Or if you want to go MacGyver style, carefully remove the bottom of the Spam can. Use a nose head plyer and pinch down any sharp edges. On our first attempt, we did this…but still got nicked. So, thank you Ninette for the $11 upgrade!

Here’s a series of photos showing how I assembled the musubi:


To seal the nori, just dap lightly a wet fingertip along one edge of the nori, then fold. And gobble it up, like me, I ate as I finished wrapping.

Now, if you’d like to try out another Spam Musubi recipe, by all means go for it, there’s a multitude of ways to personalize your own Spam Musubi experience. Here’s just a few that you might like to try by: Cooking Cute, Rashad Maiden, What’s Cooking America, Kathy YL Chan, and a YouTube vid by Single Guy Chef showing the macguiver style use of a can of spam as the mold. This last method is not recommended for the accident prone chef.

Quick Bite Recipe: Turkey Brie Roll

I have been working day & night on a Hybrid Scrapbook tutorial and promoting my latest digital scrapbook kit, Posh Picnic available exclusively at CocoaDaisy.com. Oh, by the way, included in the kit, is a super cute printable sheet of Drink Parasols. They’re fun & functional. Instead of the black sharpie method, doll up your next mixer with custom drink umbrellas. Each one is different. Print them on a various types of papers for different looks & textures. And spear fresh fruits & berries on the skewers.

Anyhow…that’s just a sneak peak into what I live breath sleep and think about all day. It’s no wonder I have no interest lately in cooking. Well, today, was one of those days, where I just could not pry myself from the laptop for too long, not even to eat. But, my stomach growls finally forced me off the net & into the kitchen. I opened the fridge and all I had was rice from last night, sliced smoked turkey, and a big wedge of brie.

Could be a disappointing fare for the unimaginative. But, creativity being my thing…i quickly thought of the fastest way to deliver those into my tummy. It’s not really a new idea…no, I can not take credit for The Roll. But, well, this combination, I dare say, I have yet to see on a menu. These puppies are done up psuedo sushi style, becuase there’s cold rice, toasted sesame seeds, and Furikake involved.

1. Center a little log of cold Jasmine rice down the center of a deli slice of smoked turkey. I especially love the Hormel Natural Choice Smoked Deli Turkey because it tastes good and it has no artificicial preservatives and no hormones. But, if none of that matters to you, use whatever kind of deli meat you love.

2. Add a half slice of brie soft cheese atop the rice. I bought this brie from Costco the other day, and really loved it. It’s creamy and has a nice mild tart afterbite.

3. Roll it up. That’s it. the toothpicks are just to hold it in place long enough to take the picture. These things went fast. I ate about 5 rolls. As a final touch, I sprinked toasted sesame seeds for the nutty flavor. And Furikake for a nice saltyness.